By Terry Sovil from the October 2016 Edition
Water safety and drowning prevention
Fall is coming! That means a return to your beloved Manzanillo. Many of you will head to the beach, spend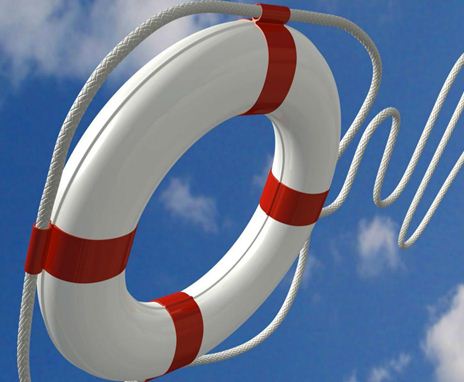 time at the condo pool or your own private pool. I wanted to talk to you a little about drowning, safety and offer some tips to help keep you, your family and friends safe. This will be a 2 parter.
Water competency
The American Red Cross (ARC) has developed a Water Competency list. This is a list of water skills that are considered critical for a swimmer to be safer. You should assure that swimmers visiting your pool, or swimming in the ocean, are capable of performing these skills with proficiency. Anyone not able to do these requires closer supervision.
Step, or jump, into water over their head
- Return to the surface and float or tread water for 1 minute
- Turn around in a full circle and spot an exit
- Swim at least 25 yards / meters to the exit (swim a few laps to get 25 yards in a smaller pool)
Exit from the water – in a pool, exit the water without using the ladder
Drowning
 Drowning is the act of dying by submersion and inhalation of water or another liquid. It is essentially death by suffocation. We often think of drowning in terms of distress, panic, screaming and waving arms. If these occur at all, they occur before drowning. Drowning itself is very quick and often silent.
A person that is at, or close to drowning, is unable to keep their head elevated and above the water so they are not able to breathe properly. Because they cannot breathe they are unable to shout or cry out. When you lack air, your body cannot perform the physical actions involved in waving or trying to attract attention.
Dry drowning and secondary drowning
Anyone that has had a near-drowning experience should be seen by a doctor. Dry and secondary drowning 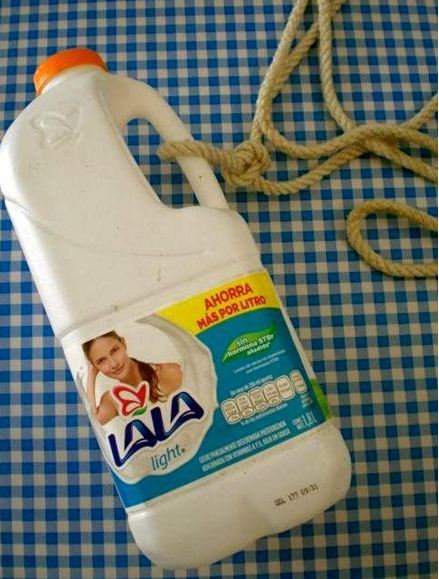 occur due to the inhalation of water that may cause problems later, not right away.
Symptoms from dry drowning generally occur right after the incident. Secondary drowning usually does not display symptoms until 1-24 hours after the incident. Both of these are very rare but they do make up 1-2% of all drowning incidents.
Symptoms of dry drowning and secondary drowning
Dry drowning and secondary drowning have the same symptoms. They include:
- Coughing
- Chest pain
- Trouble breathing
- Feeling extremely tired
A child may also exhibit changes in behavior such as becoming irritable or a noticeable drop in energy levels which can all mean that the brain is not getting the oxygen it needs.
What to do
If there is a water incident and a child shows any of the symptoms, get medical help. In most cases the symptoms will go away on their own but it is important to get them checked. Any problems that do develop are usually treatable. The sooner you seek help, the better. Your job is to monitor the child for the next 24 hours after the incident. If symptoms don’t go away, or get worse, transport them to an urgent care facility. They may need a chest x-ray, and IV and possibly be kept under observation. That can’t be done in a traditional doctor’s office.
There are no drugs for dry or secondary drowning so the child will get supportive care, monitoring them to assure that airways are clear and monitoring their oxygen level. If they have breathing problems they may be put on a breathing tube and possibly breathe pure oxygen.
Panic
When I used to teach many of the ARC courses we had to memorize a definition for panic: “Panic is a sudden, overwhelming sense of dread that inhibits a person’s ability for self-help.”
Panic is SUDDEN. It may happen quickly, even with something that is routine but goes slightly wrong. When it occurs, you can’t think about anything! You can no longer help yourself.
Panic is OVERWHELMING and affects every portion of your body. Muscles will tighten, adrenaline is released and skin may flush.
A panicked person has lost the ability to REASON. They will not hear or comprehend instructions such as “grab the rope”. If they are able to try to do something, it is usually the worst choice they could make.
Becoming PANICKED. A simple example: a new but competent swimmer thinks “I’m swimming!” But it is their first time in the ocean, they imagine “Wait! I’ve never been in this kind of water. I can’t swim here!” A sudden lack of confidence, a shadow in the water, someone splashing water could push them over the edge and into panic.
Response / rescue
The ARC taught the concepts of Reach, Throw, Row, Go. You need to do something but it is usually NOT jumping in the water to save someone. That should be a last resort and based on your abilities!
First REACH for them. This isn’t just extending an arm. A reach includes throwing a line, extending a pole, or throwing a life ring etc. I’ll talk about this in more detail.
If you have nothing available to reach with, THROW something to them. Even an almost full jug of water will float. If you can get it to them and they can grab it, they can hang on and float.
A thermos. A cooler. All of these will float.
If it is in the ocean, ROW to them if you can. A boat, a kayak, a kickboard or paddleboard or even a floating air mattress.
- GO. If you have nothing else available, don your fins if you have them. Push a float if you are able (a cooler, or floating mattress etc.). This gives you something to extend to them when you reach them.
A drowning or panicked person will grab onto you and try to climb up on you so they can get up out of the water. They will generally face safety which is where you are coming from. This is why GO is last. You need confidence and experience to engage a panicked person in the water! Look closely at where the victim is and run along the beach or the pool to shorten the distance.
 Evaluate the pool you use for length and width and safety equipment they have. If there isn’t much, get a mid-size plastic milk bottle and pick up a package of 50’ line at Home Depot. If
you are a beach person, get 75-100’ of line. Keep the milk container about 1/3 full of water. It will throw much easier with a little weight in it!
Tie a knot (remember how to do that? – see the article from the September 2016 edition) through the handle and you have something that you can reach with!
Before you throw, make sure you have one foot on the bitter end of the line! Do not throw directly at the person. Throw it over and past them. They should be able to grab the line. You can pull them to you.
If you miss and need to throw again, simply pull all the line back in and let it drop at your feet. DO NOT pick it up. DO NOT try to coil it as you go. Now, when you get the jug back, throw again.
The line will not tangle unless you’ve touched it. Practice this! It is a very simple, inexpensive tool to have within reach.
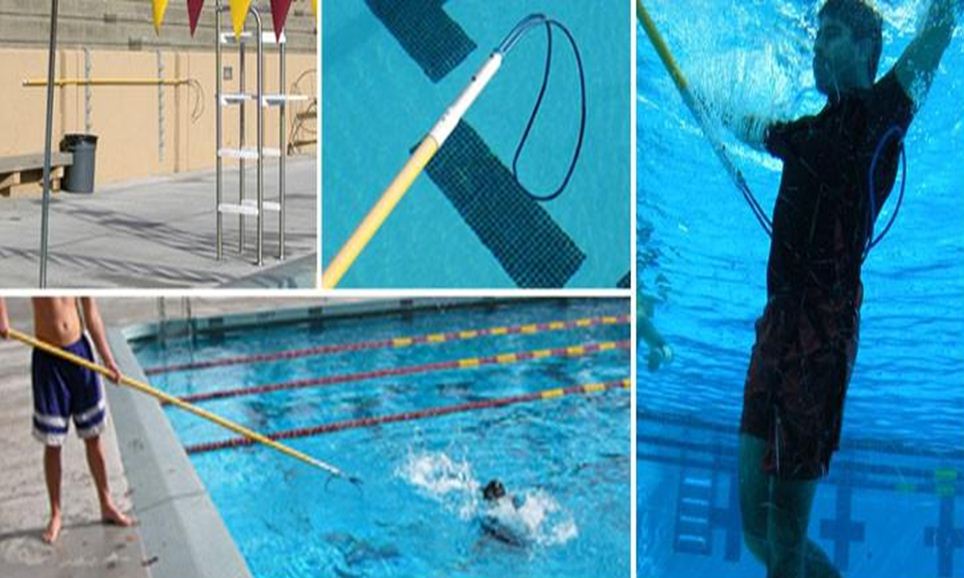
A life ring will work the same way. There are also other tools such as a “shepherd’s crook” for pools.
Until next time when we will talk about drowning and how to recognize it!
Download the full edition or view it online
—
Terry is a founding partner and scuba instructor for Aquatic Sports and Adventures (Deportes y Aventuras Acuáticas) in Manzanillo. A PADI (Professional Association of Dive Instructors) Master Instructor in his 36th year as a PADI Professional. He also holds 15 Specialty Instructor Course ratings. Terry held a US Coast Guard 50-Ton Masters (Captain’s) License. In his past corporate life, he worked in computers from 1973 to 2005 from a computer operator to a project manager for companies including GE Capital Fleet Services and Target. From 2005 to 2008, he developed and oversaw delivery of training to Target’s Loss Prevention (Asset Protection) employees on the West Coast, USA. He led a network of 80+ instructors, evaluated training, performed needs assessments and gathered feedback on the delivery of training, conducted training in Crisis Leadership and Non-Violent Crisis Intervention to Target executives. Independently, he has taught hundreds of hours of skills-based training in American Red Cross CPR, First Aid, SCUBA and sailing and managed a staff of Project Managers at LogicBay in the production of multi-media training and web sites in a fast-paced environment of artists, instructional designers, writers and developers, creating a variety of interactive training and support products for Fortune 1000 companies.